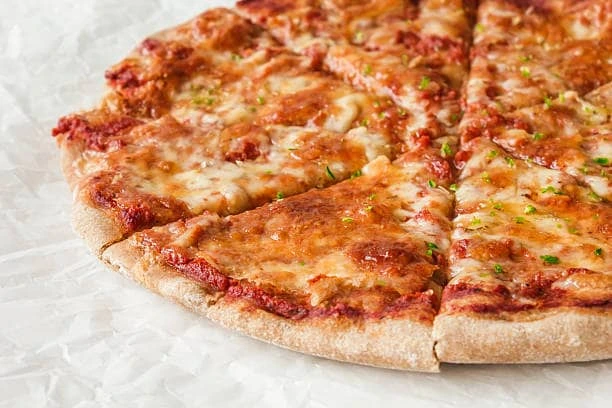
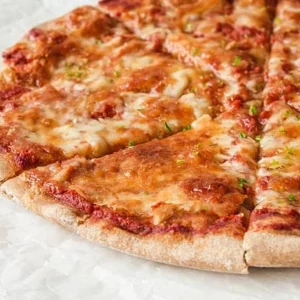
Easy Homemade Crust Pizza Recipe You’ll Love
Looking for a homemade crust pizza that’s soft, chewy, and absolutely delicious? This foolproof crust pizza recipe is exactly what you need!
Why This Pizza Crust Works
One of the biggest myths about making crust pizza at home is that it’s complicated. But the truth is, it’s super simple. With just a few pantry staples, no fancy flours, and zero stress, you can make a homemade crust pizza that rivals your favorite takeout.
The dough is flexible too. Want to make it now? Let it rise, shape, bake, and top. Prefer to prep ahead? Let it chill in the fridge and enjoy it up to 24 hours later. No matter your schedule, this recipe fits right in.
How to Make Crust Pizza
Making this crust pizza recipe is straightforward. Whether you’re using active dry or instant yeast, you’ll mix your ingredients in one bowl, knead gently (stand mixer optional), and let the dough do its magic. After a rise, it’s time to shape and stretch it into your ideal pizza-round or rectangular, thick or thin.
What makes this dough even better? A quick rest between shaping stretches makes it easier to handle, and a light drizzle of olive oil in the pan gives you that golden, crispy crust we all love.
Jump to RecipePro Tips for the Best Homemade Crust
- Flour Matters: All-purpose flour works perfectly, but bread flour will give you a crispier bite.
- Flavor Boost: Add a pinch of garlic powder or dried herbs to the dough for extra flavor.
- Rest is Key: Letting the dough rest before final shaping reduces spring-back and helps create the perfect shape.
- Double Bake Option: For make-ahead pizza, partially bake the crust, then top and finish baking later. Game-changer for busy nights.
Pizza Crust
Equipment
- Mixing Bowl For combining and kneading ingredients.
- Measuring Cups & Scale To ensure accurate flour/water ratios.
- Stand Mixer (Optional): Speeds up kneading.
- Plastic Wrap or Damp Towel For covering dough during rising.
- Baking Sheet or Pizza Pan: To bake your pizza.
- Oven (Preheated to 450°F) For baking the crust.
- Vegetable Oil Spray Prevents sticking and adds flavor.
- Bench Scraper or Knife To divide dough if making two pizzas.
- Scissors (Optional) For slicing the finished pizza.
Ingredients
- 2 tsps active dry yeast or instant yeast
- ⅞ to 1⅛ cups lukewarm water (198g to 255g)
- 2 tbsps olive oil (25g)
- 3 cups King Arthur unbleached all-purpose flour (360g)
- 1¼ tsps salt (8g)
- pinch sugar
Instructions
- If you’re using active dry yeast, dissolve it, with a pinch of sugar, in 2 tablespoons of the lukewarm water. Let the yeast and water sit at room temperature for 15 minutes, until the mixture has bubbled and expanded. If you’re using instant yeast, you can skip this step.2 tsps active dry yeast or instant yeast, ⅞ to 1⅛ cups lukewarm water, pinch sugar
- Weigh your flour; or measure it by gently spooning it into a cup, then sweeping off any excess.3 cups King Arthur unbleached all-purpose flour
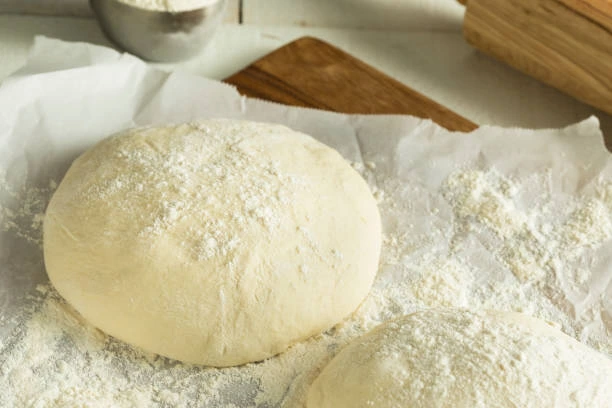
- Combine the dissolved yeast (or the instant yeast) with the remainder of the ingredients. Mix and knead everything together by hand, mixer or bread machine set on the dough cycle till you’ve made a soft, smooth dough. If you’re kneading in a stand mixer, it should take 4 to 5 minutes at second speed, and the dough should barely clean the sides of the bowl, perhaps sticking a bit at the bottom. Don’t over-knead the dough; it should hold together, but can still look fairly rough on the surface. To make pizza up to 24 hours later, skip to step 5.2 tbsps olive oil, 1¼ tsps salt
- To make the pizza NOW: Place the dough in a lightly greased bowl, cover the bowl, and allow it to rise till it’s very puffy. This will take about an hour using instant yeast, or 90 minutes using active dry. If it takes longer, that’s OK; just give it some extra time.
- To make the pizza LATER: Allow the dough to rise, covered, for 45 minutes at room temperature. Refrigerate the dough for 4 hours (or for up to 24 hours); it will rise slowly as it chills. This step allows you more schedule flexibility; it also develops the crust’s flavor. About 2 to 3 hours before you want to serve pizza, remove the dough from the refrigerator.
- Decide what size, shape, and thickness of pizza you want to make. This recipe will make one of the following choices: two 1/2″-thick 14″ round pizzas (pictured); two 3/4″-thick 12″ round pizzas; one 3/4″ to 1″-thick 13″ x 18″ rectangular (Sicilian-style) pizza (pictured); one 11/2″-thick 9″ x 13″ rectangular pizza; one 1″-thick 14″ round pizza. Divide the dough in half, for two pizzas; or leave it whole for one pizza.
- If you’re making a rectangular pizza, shape the dough into a rough oval. For a round pizza, shape it into a rough circle. In either case, don’t pat it flat; just stretch it briefly into shape. Allow the dough to rest, covered with an overturned bowl or lightly greased plastic wrap, for 15 minutes.
- Use vegetable oil pan spray to lightly grease the pan(s) of your choice. Drizzle some olive oil into the bottom of the pan(s). The pan spray keeps the pizza from sticking; the olive oil gives the crust great flavor and crunch.
- Place the dough in the prepared pan(s). Press it over the bottom of the pan, stretching it towards the edges. You’ll probably get about two-thirds of the way there before the dough starts shrinking back; walk away for 15 minutes. Cover the dough while you’re away, so it doesn’t dry out.
- When you come back, you should be able to pat the dough closer to the corners of the pan. Repeat the rest and dough-stretch one more time, if necessary; your goal is to get the dough to fill the pan as fully as possible.
- Allow the dough to rise, covered, till it’s noticeably puffy, about 90 minutes (if it hasn’t been refrigerated); or 2 to 2½ hours (if it’s been refrigerated). Towards the end of the rising time, preheat the oven to 450°F.
- Bake the pizza on the lower oven rack till it looks and feels set on top, and is just beginning to brown around the edge of the crust, but is still pale on top. This will take about 8 minutes for thinner crust pizza; about 10 to 12 minutes for medium thickness; and 12 to 14 minutes for thick-crust pizza. If you’re baking two pizzas, reverse them in the oven (top to bottom, bottom to top) midway through the baking period.
- And, to serve pizza immediately: Remove it from the oven, arrange your toppings of choice on top. Return to the oven, and bake on the upper oven rack for an additional 10 to 15 minutes, until the crust is nicely browned, both top and bottom, and the cheese is melted. Check it midway through, and move it to the bottom rack if the top is browning too much, or the bottom not enough.
- To serve pizza up to 2 days later: Remove the untopped, partially baked crust from the oven, cool completely on a rack, wrap in plastic, and store at room temperature. When ready to serve, top and bake in a preheated 450°F oven, adding a couple of minutes to the baking times noted above. Your goal is a pizza whose crust is browned, and whose toppings are hot/melted.
- Remove the pizza from the oven, and transfer it from the pan to a rack to cool slightly before serving. For easiest serving, cut with a pair of scissors.
Notes
Customizations:
- Whole Wheat Version: Replace up to 50% of the all-purpose flour with whole wheat flour.
- Herbed Crust: Mix in dried herbs (oregano, thyme) or garlic powder.
- Gluten-Free: Use a gluten-free flour mix and adjust hydration as needed.
Serving Tips:
- Let the pizza cool slightly before slicing.
- Use scissors for easy cutting.
- Serve with dipping sauces like garlic butter or marinara.
Cooking Tips:
- Always preheat your oven to ensure crisp crust.
- Don’t over-knead the dough—it should be soft but not sticky.
- Let dough rest between stretches to reduce elasticity and help shaping.
Nutrition

Hi, I’m Chef B! Passionate about all things culinary, I’ve spent years perfecting my recipes to bring bold flavors to your kitchen. Let’s cook up something delicious together!